
Connecting Proxmox Backup Server to S3 for Cloud Backups

Update: Proxmox Backup Server now has native S3 integration, and while it is considered a technical preview, it works quite well, thus rendering this guide sort of pointless.
Since, as a distinguished person of intellect and esteem, you're undoubtedly using Proxmox Virtual Environment (PVE) as your hypervisor, it's safe to assume you are also using Proxmox Backup Server (PBS) for... well, backups. Unfortunately, while S3 storage integration is on the roadmap for PBS, currently there is no native integration, which is a shame as S3 is cheap and usually offers immutability features.
But fret not! This is the internet! We have options! In this case, several of them, but I'd like to talk about my preferred method, using a free open-source application called rClone.
In short, rClone allows you to connect to a TON of different storage services, from Google Drive, to (Drop)Box, OneDrive, WebDAV (Including nextcloud), etc. It's actually one of the only ways to natively use ProtonDrive on linux, (via an unofficial API, since Proton apparently can't be bothered to release an official one. Get it together guys.) As of right now, when running rclone config from the vanilla Debian repo, there are 46 different integrations listed. That is, in fact, a "spicy meatball." as the kids would say.
Install rClone
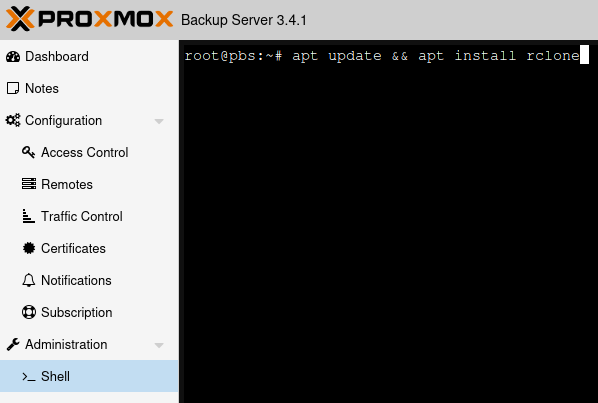
So the first step, assuming you already have your PBS server up and running, would be to pop into the web UI, and click Shell under Administration (or SSH in or whatever, your call.)
Then, since rclone is in Debian's default repositories, you're going to run the following command:
apt update && apt install rclone
Configure rClone
With rClone successfully installed, go ahead and run the following command:
rlcone config
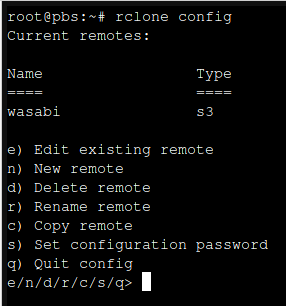
Connections to cloud storage are called "remotes".
As you can see here, I already have Wasabi configured as a remote.
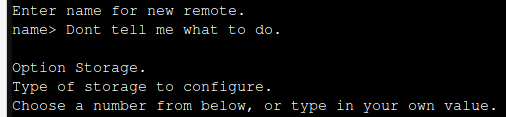
Type "n" and press enter to configure a new remote, then enter a name for the remote.
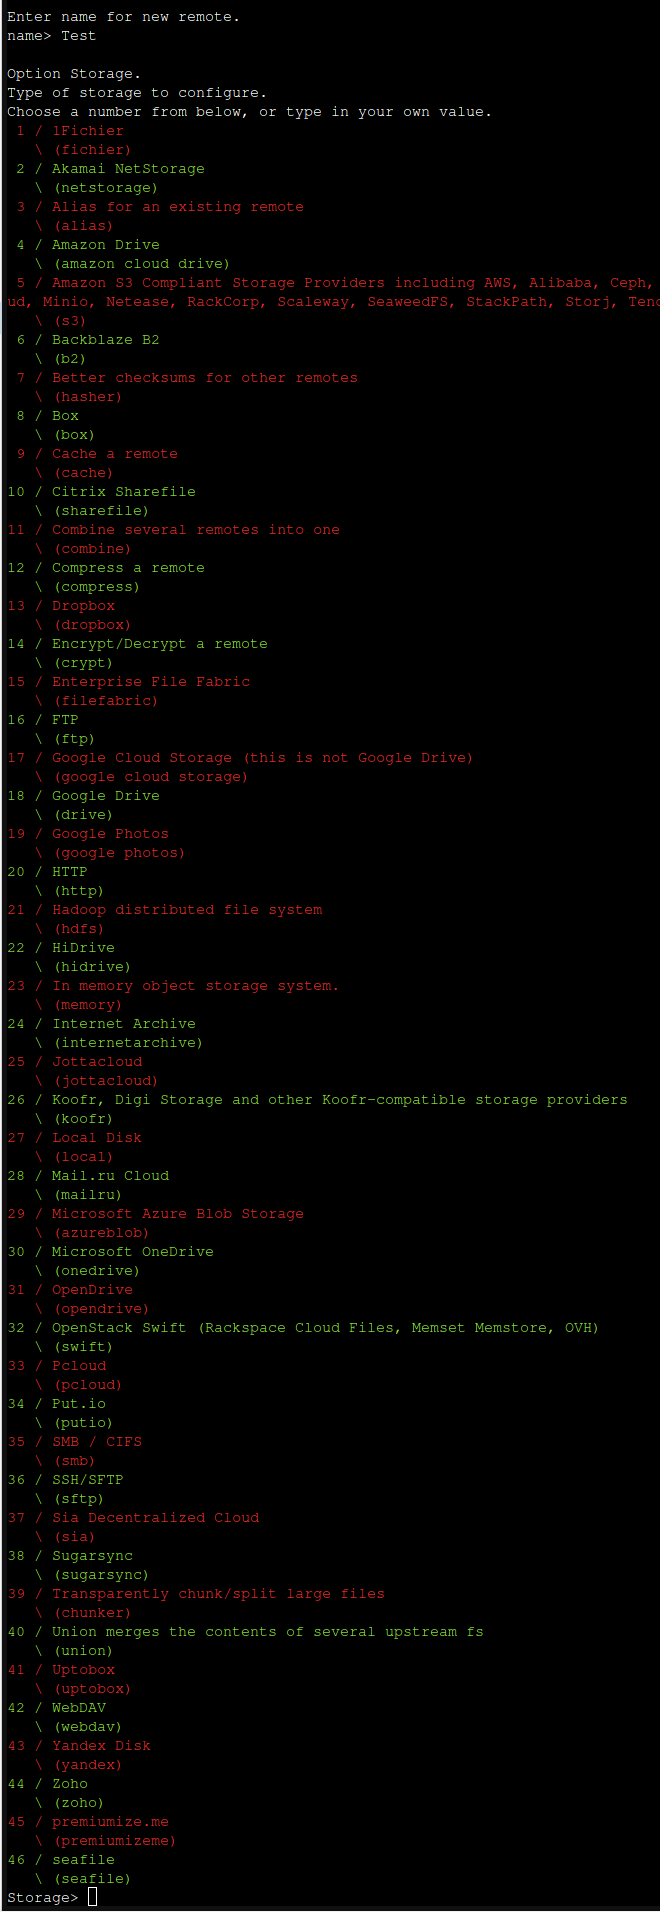
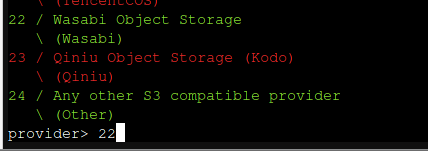
Now you'll be given a big long list of storage providers.The one we want is actually number 5, labelled as "Amazon S3 Compliant Storage Providers"

Press 5, then hit Enter. You'll be presented with a list of S3 providers. If your provider is listed here, choose it, otherwise you can choose the "Any other S3 compatible provider option." but you may have to do a bit more legwork in configuration. We'll choose option 22 since we are using Wasabi.
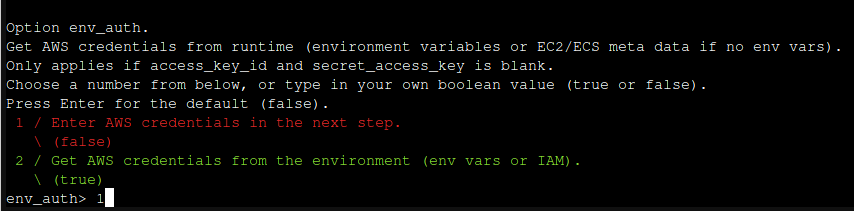
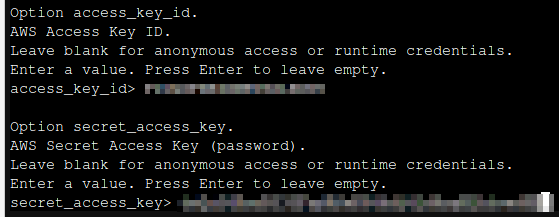
For this next question, we'll select option 1 and provide the ID and key ourselves.
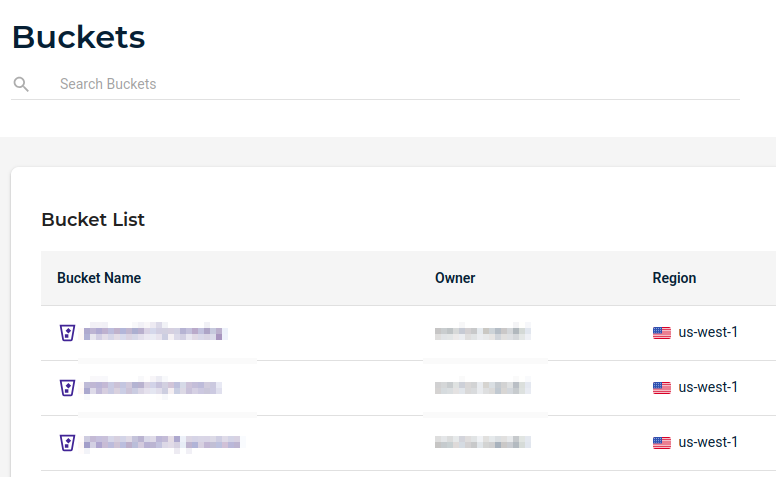
You'll want to make sure you have a storage bucket created just for PBS. You'll also want a dedicated user created with the proper permissions to access the bucket you plan to store your data in. You'll want to keep those permissions to an absolute minimum in case the credentials are compromised (Which is admittedly very unlikely, but better safe than sorry.) Since that varies so much depending on the provide platform I will leave it to you to sort that out.
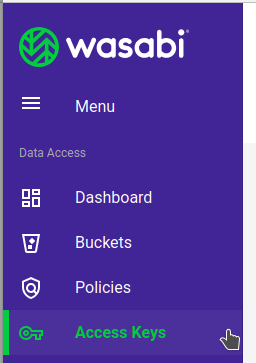
Next you'll need to create an ID and key. This varies depending on the S3 provider, but in Wasabi it works like this. Log in, and click "Access Keys"
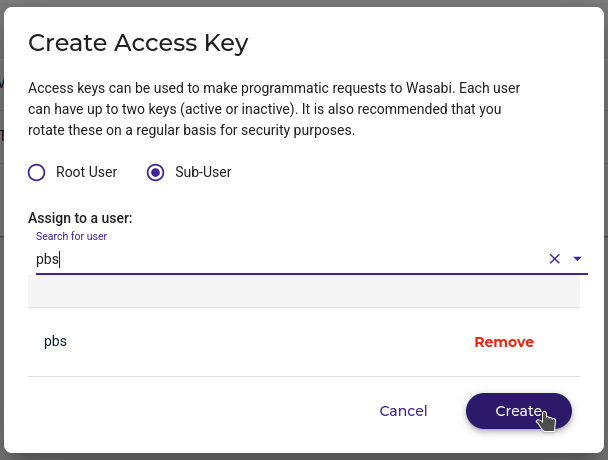
In the top right, click "Create Access Key"

Choose Sub-User, select a user, and click "Create". Please, please don't use the root user.
You did it! Now the terminology here is obnoxious and inconsistent, but the "ID" rClone is asking for is the "Access Key" and the "Key" rClone needs is the "Secret Key"
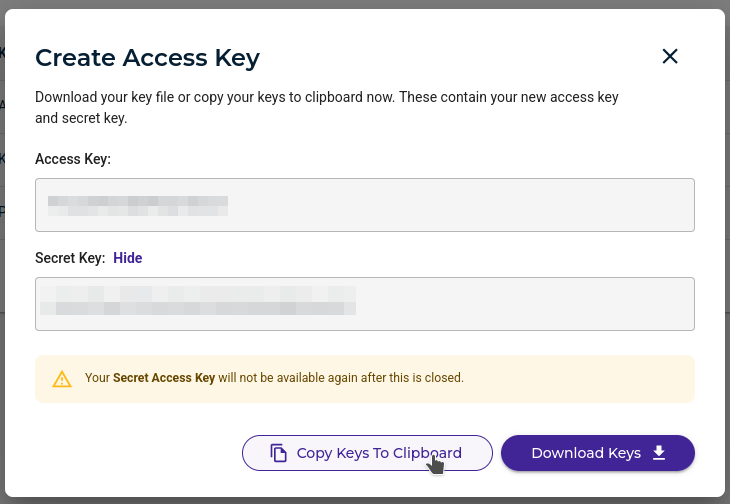
So go ahead and enter the "Access Key" followed by the "Secret Key"
For storage region, go ahead and hit enter:

You should be presented with a list. Choose the one where your bucket is located (Check your storage provider's Web UI.)
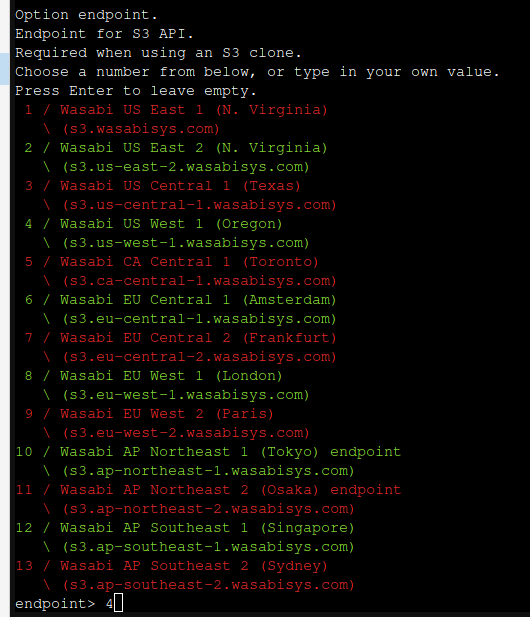
From here onwards you're probably safe using the defaults.
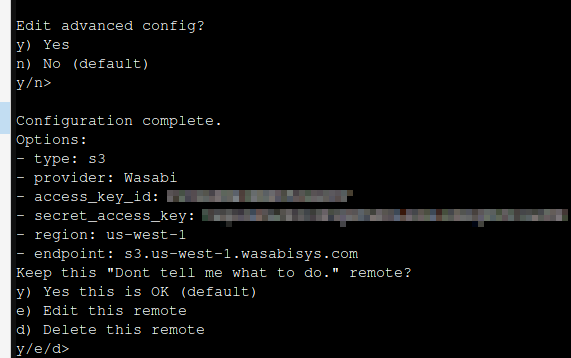
After hitting enter a few times, you should see an output like this:
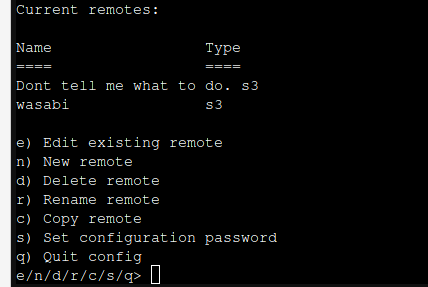
Congratulations! You've connected your S3 bucket. "q" to quit, then we'll move on to the next step...
For more in-depth info on Rclone's S3 options, check out their official documentation:
Mount Your Bucket!
Now we want to integrate this storage with the PBS Web UI, so we can see and manage all our backups.
There is a command, "rclone mount", that will allow you to mount your storage as a regular old directory. From there you can add it to PBS just like any other folder (kind of... More on that later.)
There are a ton of options here, but you probably want your command to look something like this:
/usr/bin/rclone mount rclone-remote-name:/bucket-name /mounted-folder --allow-other --umask 755 --timeout 30s --config /root/.config/rclone/rclone.conf --vfs-disk-space-total-size 20T
- Make sure you actually create the directory you intend to mount into with "mkdir /mounted-folder"
- Replace "rclone-remote-name" with whatever you named your rclone remote.
- Replace "bucket-name" with the name of your S3 storage bucket.
- Replace "mounted-folder" with the mountpoint you'd like on the local filesystem.
- (Optional) Replace the 20T with any storage value to simulate a drive of that size (e.g. 100G will show up as having 100 Gigabytes of storage.)
You probably don't want to have to do this manually every time your computer reboots though. To make this happen automatically, we'll create a systemd service. Go ahead and create a new one (name it whatever you want):
nano /etc/systemd/system/mount-s3-or-something.service
Within that file, add:
[Unit]
Description=rclonemount
After=multi-user.target

[Service]
Type=simple
User=root
ExecStart=/usr/bin/rclone mount rclone-remote-name:/bucket-name /mounted-folder --allow-other --umask 755 --timeout 30s --config /root/.config/rclone/rclone.conf --vfs-disk-space-total-size 20T
ExecStop=fusermount -u /mounted-folder
Restart=on-abort

[Install]
WantedBy=multi-user.target
Make sure to edit the "ExecStart" line and change it to the correct command as we did above. Also chane the ExecStop line to reference the correct mount directory. Save the file, then run the following to enable mounting at boot:
systemctl daemon-reload && systemctl enable mount-s3-or-something.service
And if you'd like to mount manually:
systemctl start mount-s3-or-something.service
Very cool.
Add the thing to the thing!
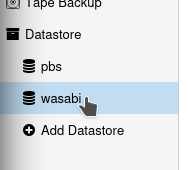
Now it's time to pop into the PBS UI and add our folder as a storage location! Way down in the bottom left is "Add Datastore"
Go ahead and enter as below-ish. "Name" can be whatever you like. "Backing Path" is your mounted folder. Set your Garbage Collection and pruning as you like.
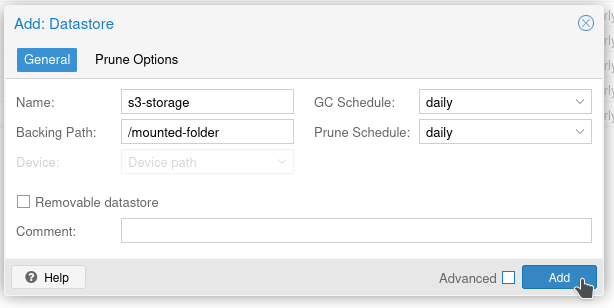
And it will fail!
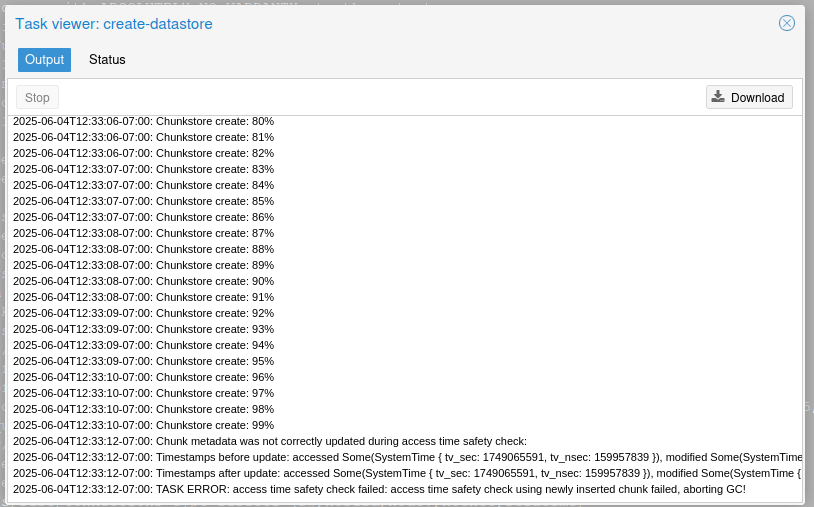
Why? Because S3 storage over FUSE doesn't support access time (atime) metadata for files and folders, and PBS uses atime extensively to know which chunks of data the garbage collection service is allowed to delete. We can override this, but it would pretty much break garbage collection (and thus deduplication) so we probably don't want to do that.
But wait!
Since we (presumably) have an existing set of backups on a local drive, we can pull a little sneaky here.
- Create an rClone remote for S3 Storage (Done)
- Mount the remote in a folder (Done)
- Set up a local datastore in PBS (Done, hopefully.)
- Set up garbage collection on the local datastore. (Done, hopefully)
- Create an rclone script to mirror our local datastore into our S3 storage.
- Run the script once, thus cheating and creating a datastore in S3 manually.
- Run that script automatically on a regular basis, after garbage collection.
- Add the mounted folder as a datastore so we can see & somewhat manage our backups in the UI
The cool thing about doing it this way, is we will be running the "rclone sync" command, which speaks directly to the local filesystem and S3, and removes the FUSE mounting layer in the middle. That'll make the transfers WAY faster and less prone to random issues. Let's get started.
The command to sync from a local folder to your S3 storage will look something like this:
/usr/bin/rclone sync /local-datastore rclone-remote-name:/bucket-name --progress -v -v -v -v --delete-excluded
- Change "/local-datastore" to wherever your existing datastore is.
- Change "rclone-remote-name" to the name of your S3 remote.
- Change "bucket-name" to your bucket.
The "--delete-excluded" option here is important. This will delete any files in the destination (S3) that are not present in the source (Local Datastore). As long as we run Garbage collection on the local datastore, the remote one is garbage cleaned as well.
Wait!
If you don't have a lot of data in your local datastore, you can run the sync command one time, and wait for it to finish before proceeding. If you do have a lot of data, keep reading.
Now let's create a systemd service (but not enable it):
nano /etc/systemd/system/rclone-sync.service
Add something like this:
[Unit]
Description=rclone wasabi sync
#After=multi-user.target
Wants=rclone-sync.timer

[Service]
Type=oneshot
User=root

ExecStart=/usr/bin/rclone sync /local-datastore rclone-remote-name:/bucket-name --progress -v -v -v -v --delete-excluded
#ExecStop=fusermount -u /wasabi
#Restart=on-abort
[Install]
WantedBy=multi-user.target
Save that. Then we'll create a systemd timer to run that service at a certain time:
nano /etc/systemd/system/rclone-sync.timer
Add something like this (Will run at 4AM everyday.
[Unit]
Description=Logs some system statistics to the systemd journal
Requires=rclone-sync.service

[Timer]
Unit=rclone-sync.service
OnCalendar=*-*-* 04:00:00
AccuracySec=1us


[Install]
WantedBy=timers.target
Now save that, and run the following to enable the timer:
systemctl daemon-reload && systemctl enable rclone-sync.timer
Remember, enable the timer, not the service, unless you want the service to run every time you reboot.
Wait!
If you DO have a lot of data to transfer, and you didn't already run the command to copy everything over, I recommend you run the service once, now, and leave it running overnight:
systemctl start rclone-sync.service
Add the Datastore
So at this point we've created our "remote" in rclone, created a service to mount it to a local folder, and set up a service & timer to copy everything over. Now we just need to actually make it a datastore.
Since we now effectively do have a datastore initialized on our S3 storage, we can't add it as a datastore to PBS or it will throw a fit about there being a datastore there already. Luckily it's very easy to add an existing one manually.
In the shell, go ahead and edit the storage config file:
nano /etc/proxmox-backup/datastore.cfg
Now add a new section that looks something like this:
datastore: s3-storage
    gc-schedule daily
    path /s3-storage
Change the name and path as appropriate, and save.
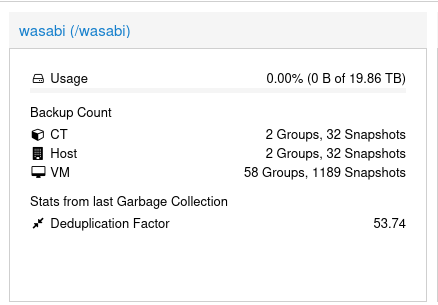
Within just a few seconds it should appear (mine is called wasabi)
Usage will absolutely not be reported correctly.
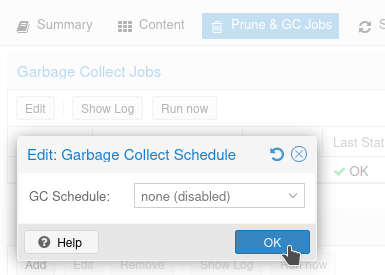
Go ahead and disable Garbage Collection for the S3 storage, since it won't work anyhow.
In Conclusion:
You're going to want to send backups from Proxmox into the local datastore, then allow them to be copied over. Sending them from proxmox directly to S3 will probably fail.
Having said all that, we CAN see our backups, and we can even add this datastore to Proxmox the usual way and still see and restore backups directly from the cloud just fine! Basically from the UI side of things, treat the S3 datastore more-or-less as read-only.
On Immutability
With Wasabi, Immutability effectively takes daily snapshots of data, which cannot be deleted or modified until a certain date. Immutability is, however, outside the scope of this tutorial (and different for every S3 provider) so I won't be covering it. Just be aware that Immutability is an option with most S3 providers, reference their documentation on enabling it, and when using this setup it should work just fine.


