
Ideal Proxmox Settings for a Linux VM

I've done a lot of experimenting, and I have found a really great combination of settings for Proxmox to optimize the performance of Linux-based VMs. It's not as difficult as wrangling Windows VMs but there are a few potential pitfalls to avoid. Let's get started!

In Proxmox, let's click Create VM in the top-right.
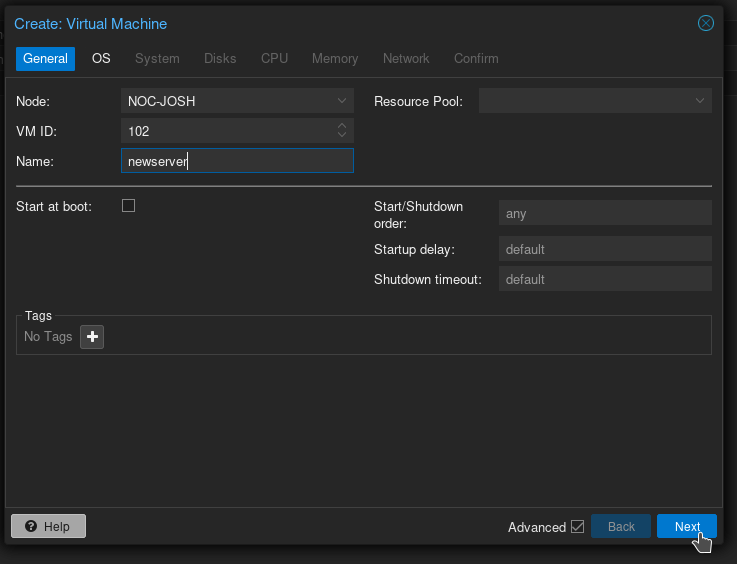
Let's check the box near the bottom right marked Advanced, Enter a Name, and click Next. I like to make sure the name matches the future hostname of our VM, but they're easy to rename later on.
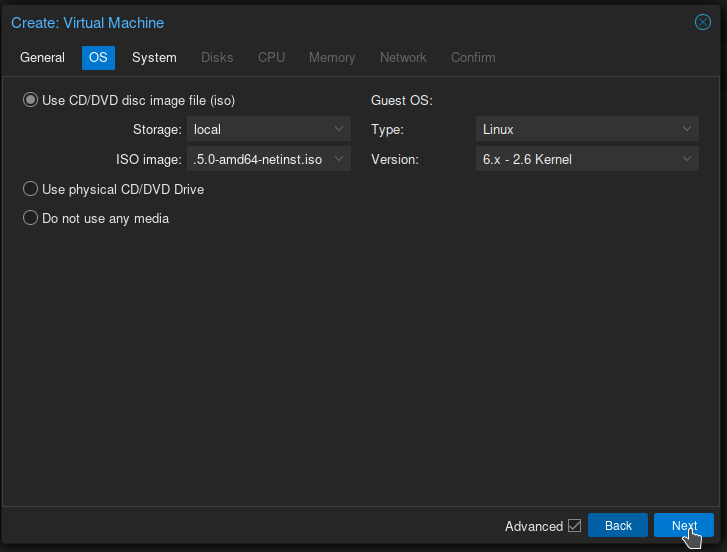
For Storage, choose the Storage location where you placed your ISO, and then choose your Linux ISO. Leave Guest OS as Type: Linux and Version (latest). Click Next.
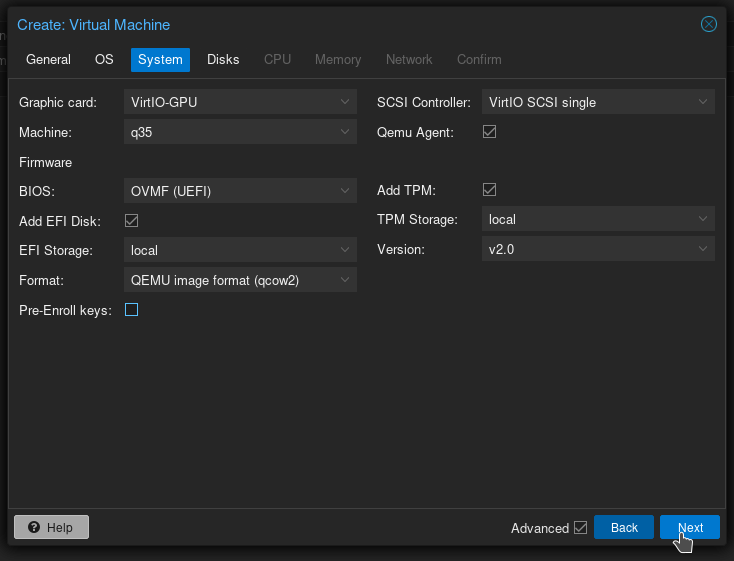
For GPU, we use VirtIO-GPU as it is highly performant, and allows us to use SPICE.
We leave SCSI Controller as-is (VirtIO SCSI Single)
Check the box for Qemu Agent. Having the QEMU agent on our VM gives us a bunch of cool features within Proxmox.
We change BIOS to OVMF (UEFI) as Legacy BIOS is largely deprecated at this point.
That means we have no choice but to add EFI storage. Choose the same storage location as you plan to keep the VM on.
Uncheck Pre-Enroll Keys, otherwise Secure Boot will be on & enforced, and your VM will likely not boot.
We'll check the box for Add TPM and change Storage to the same as our VM. We likely won't need this but it's better to have it now, and it doesn't hurt anything.
Click Next.
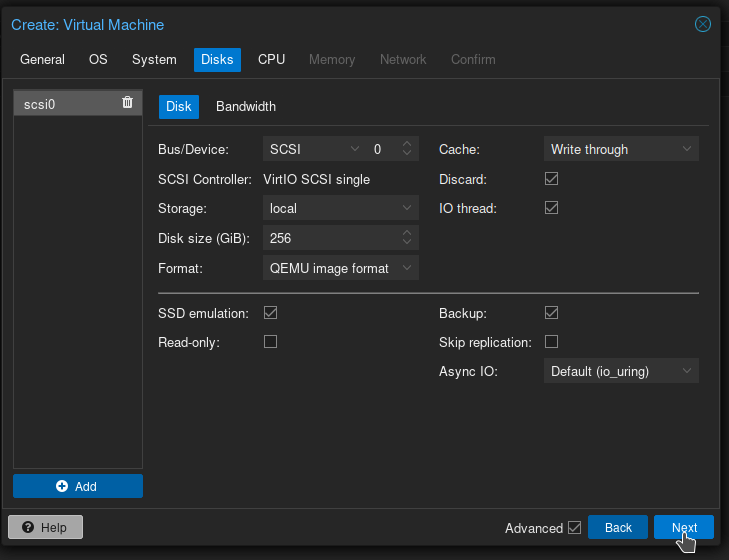
Now on to Disks, we have some choices to make here.
For Bus/Device, we want SCSI for performance reasons.
For Cache, this table shows some really good info. Cache can affect disk performance in a very significant way, and with better performance generally comes a risk of losing data in the event of a power outage. I prefer Write through; Read speeds are increased as Proxmox caches reads from the virtual drive, but writes are 100% safe as there is no write cache to disappear if the power goes out. You do take a bit of a performance hit on Writes but for our workloads it hasn't been noticeable and I'd rather be safe than sorry.
Write back is the best performing (excluding unsafe which should only be used in testing.) If your machine is on a proper UPS, has redundant PSUs, and you're really strapped for performance Write back can be a good option.
On to Format: A 256GB QEMU image (QCOW2) will only take up as much space on disk as is actually being used (which is less than 10GB after a fresh install.) a RAW disk will take up exactly as much space as we specify in Disk Size BUT has the added benefit of being faster, sometimes significantly so. If you have an abundance of storage, RAW is the way to go, otherwise I prefer QCOW2 if it's available.
If the Storage you are putting the virtual disk on is flash-based (so SSD, not HDD) you're going to want to check the box marked Discard, as well as SSD Emulation. This will allow the VM to know it's an SSD and to reclaim empty space when files are deleted.
Finally the Backup checkbox; If unchecked, this drive will not be kept when the VM is backed up, so make sure it's checked!
Click Next.
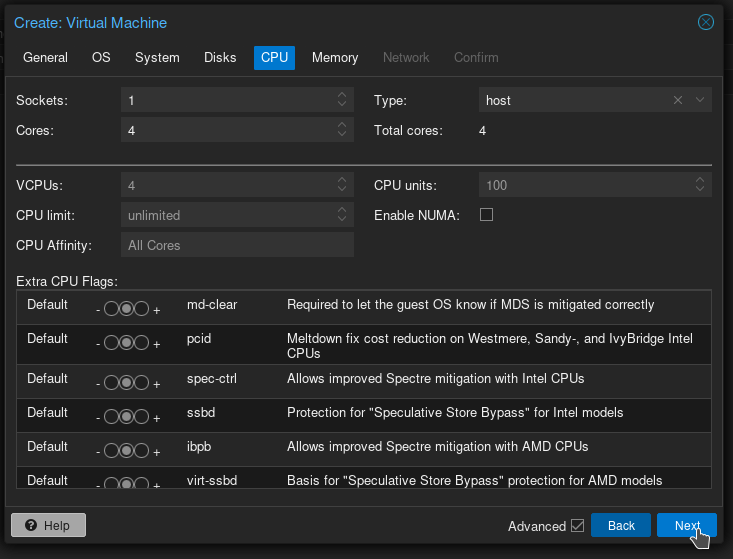
Next up, we have CPU.
The VAST majority of the time, you're going to want to set Type to host. This will yield maximum performance, and the only time it might cause issues is if you are trying to live-migrate a VM from one server to another with a different model of CPU.
For Sockets, if your machine supports NUMA, set this to the same number of sockets as your machine and check the Enable NUMA box. (As a general rule, if you have a multi-socket system, you can turn on NUMA in the BIOS) Otherwise set Sockets to 1.
For Cores, set this acording to your workload. 4 Cores total is a good starting point. Remember, this cannot be higher than the total number of cores your Proxmox server has.
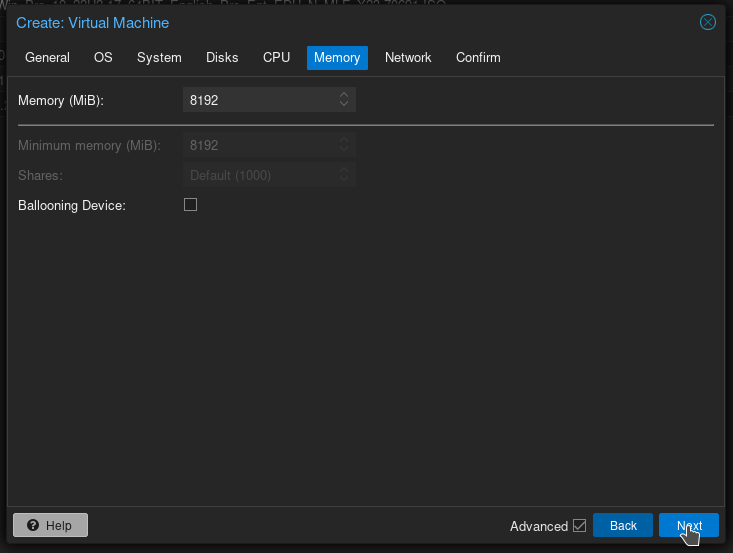
For Memory, Choose an amount that seems appropriate (remember, 1GB = 1024MB)
With Ballooning, If you have plenty of RAM I would leave this unchecked, as you'll likely see a small performance boost. If you are at all memory constrained, check the box. For Minimum memory, In the event your Proxmox host's RAM starts to fill up, Proxmox will cut back the RAM available to each VM. Setting this minimum ensures that VM will never be cut back below that limit. It's an unlikely scenario unless your server is really stressed, so leaving Minimum the same as Memory is usually fine. Click Next.

On to Network, set your VLAN if needed.
Leave Model as VirtIO, and set Multiqueue to the same as the number of cores in your virtual CPU. This isn't well documented but it allows packets to be split into separate queues to be processed simultaneously and can speed things up. Click Next.

You did it!
Windows VM Guide coming soon...


