Let's make a ZoneMinder Server!

If you haven't yet heard of it, Zoneminder is a super cool open-source application for recording IP camera footage. It works with just about every IP camera in existence, and it costs exactly $0 (assuming you have the hardware that is...) In this post (and at least a few subsequent ones) I will guide you through setting up a Zoneminder server.
I am going to be a bit opinionated in my configuration here, in the following ways:
- I want to SSL all the things. Even self-signed is better than nothing, as it protects against passive sniffing.
- I want 24/7 recording, plus motion detection, because motion detection saves hours scrubbing through video, but it is not bulletproof by any means.
- I want it to run LEAN. As little resources as humanly possible so I can squeeze as much performance as possible out of my servers. We will pull some dirty tricks to make this happen.
I am going to assume you already have a regular Debian VM set up as a base. (If not, go do that now!) Make sure it's all up-to-date, and has a static IP and hostname.
Let's start with the Database:
Make yourself root:
sudo su
Install all the things!:
apt install apache2 mariadb-server php libapache2-mod-php php-mysql lsb-release gnupg2
Open the mariaDB console:
mariadb
Run some mariaDB commands to create a user and a database, and grant the necessary permissions.
Replace Some32CharacterLongAlphanumericString with a randomly generated password.
CREATE DATABASE zm;
CREATE USER zmuser@localhost IDENTIFIED BY 'Some32CharacterLongAlphanumericString';
GRANT ALL ON zm.* TO zmuser@localhost;
FLUSH PRIVILEGES;
exit;
Run this, follow the instructions, set the root password to a random super long string (different from Some32CharacterLongAlphanumericString). Enable socket only & all the more secure options when prompted.
mariadb-secure-installation
Add the ZoneMinder Repo, and install zoneminder:
echo 'deb http://deb.debian.org/debian bookworm-backports main contrib' >> /etc/apt/sources.list
apt update
apt -t bookworm-backports install zoneminder
Run the included script to create the ZoneMinder DB:
When prompted for password, enter Some32CharacterLongAlphanumericString per earlier
mariadb -u zmuser -p zm < /usr/share/zoneminder/db/zm_create.sql
chgrp -c www-data /etc/zm/zm.conf
Edit ze password file!
Zoneminder uses this to access the database. Yes, it is plaintext. Don't reuse the password, don't save it anywhere else. Do not use this MariaDB installation for anything else. If they get this far, you're probably screwed anyway.
nano /etc/zm/conf.d/03-zmpass.conf
Paste in ze contents! (Replace the string with your password)
ZM_DB_PASS=Some32CharacterLongAlphanumericString
Let's make some performance tweaks as well:
nano /etc/mysql/my.cnf
Replace the contents with this:
[mysqld]
performance_schema=ON
innodb_buffer_pool_size=1G
innodb_log_file_size=256M
skip-name-resolve=1
tmp_table_size=128M
max_heap_table_size=128M
max_connections = 1024

[mariadb]
performance_schema=ON
innodb_buffer_pool_size=1G
innodb_log_file_size=256M
skip-name-resolve=1
tmp_memory_table_size=128M
max_heap_table_size=128M
max_connections = 1024
I've found these to be good general settings, but if you want to further optimized after installation is complete and cameras are rolling you can use MySQLTuner: https://www.linode.com/docs/guides/how-to-optimize-mysql-performance-using-mysqltuner/
...and now the webserver
Generate a self-signed cert for SSL (You can replace this later with a real cert, don't worry.)
make-ssl-cert generate-default-snakeoil --force-overwrite
Now we enable all the apache modules we'll need.
a2enconf zoneminder a2enmod rewrite a2enmod headers a2enmod expires a2enmod cgi a2enmod ssl a2ensite default-ssl
Let's edit the apache config:
nano /etc/apache2/sites-available/000-default.conf
And replace all the content with the following:
Read the comments in the code for clarification
#This section redirects http to https
<VirtualHost *:80>
        RewriteEngine On
        RewriteCond %{HTTPS} off
        RewriteRule (.*) https://%{HTTP_HOST}%{REQUEST_URI}
</VirtualHost>
#Browsers are limited by default to like 4 streams at once.
#Adding a bunch of ports allows ZMNinja to view many cameras at once.
<VirtualHost _default_:443 _default_:30000 _default_:30001 _default_:30002 _default_:30003 _default_:30004 _default_:30005 _default_:30006 _default_:30007 _default_:30008 _default_:30009 _default_:30010 _default_:30011 _default_:30012 _default_:30013 _default_:30014 _default_:30015 _default_:30016 _default_:30017 _default_:30018 _default_:30019 _default_:30020 _default_:30021 _default_:30022 _default_:30023 _default_:30024 _default_:30025 _default_:30026 _default_:30027 _default_:30028 _default_:30029 _default_:30030 _default_:30031 _default_:30032 _default_:30033 _default_:30034 _default_:30035 _default_:30036 _default_:30037 _default_:30038 _default_:30039 _default_:30040 _default_:30041 _default_:30042 _default_:30043 _default_:30044 _default_:30045 _default_:30046 _default_:30047 _default_:30048 _default_:30049 _default_:30050>
        SSLEngine on
        #This is where you'd point to your legitimate SSL cert
        SSLCertificateFile    /etc/ssl/certs/ssl-cert-snakeoil.pem
        SSLCertificateKeyFile   /etc/ssl/private/ssl-cert-snakeoil.key
        ServerAdmin webmaster@localhost
        DocumentRoot /var/www/html
        ErrorLog ${APACHE_LOG_DIR}/error.log
        CustomLog ${APACHE_LOG_DIR}/access.log combined
        #Change this to your server's FQDN
        ServerName host.example.org
        #This redirects the root URL to /zm so you don't get a blank page
        RedirectMatch "^/$" "https://host.example.org/zm"
</VirtualHost>
Now we'll edit the apache ports config to match:
nano /etc/apache2/ports.conf
Replace the content with this:
Listen 80
<IfModule ssl_module>
        Listen 443 https
        Listen 30000 https
        Listen 30001 https
        Listen 30002 https
        Listen 30003 https
        Listen 30004 https
        Listen 30005 https
        Listen 30006 https
        Listen 30007 https
        Listen 30008 https
        Listen 30009 https
        Listen 30010 https
        Listen 30011 https
        Listen 30012 https
        Listen 30013 https
        Listen 30014 https
        Listen 30015 https
        Listen 30016 https
        Listen 30017 https
        Listen 30018 https
        Listen 30019 https
        Listen 30020 https
        Listen 30021 https
        Listen 30022 https
        Listen 30023 https
        Listen 30024 https
        Listen 30025 https
        Listen 30026 https
        Listen 30027 https
        Listen 30028 https
        Listen 30029 https
        Listen 30030 https
        Listen 30031 https
        Listen 30032 https
        Listen 30033 https
        Listen 30034 https
        Listen 30035 https
        Listen 30036 https
        Listen 30037 https
        Listen 30038 https
        Listen 30039 https
        Listen 30040 https
        Listen 30041 https
        Listen 30042 https
        Listen 30043 https
        Listen 30044 https
        Listen 30045 https
        Listen 30046 https
        Listen 30047 https
        Listen 30048 https
        Listen 30049 https
        Listen 30050 https
</IfModule>
Now we'll backup the Zoneminder config for apache and edit a clean one:
mv /etc/apache2/conf-available/zoneminder.conf /etc/apache2/conf-available/zoneminder.conf.bak
nano /etc/apache2/conf-available/zoneminder.conf
Let's replace the content with this:
ScriptAlias /zm/cgi-bin "/usr/lib/zoneminder/cgi-bin"
<Directory "/usr/lib/zoneminder/cgi-bin">
    Options +ExecCGI -Multiviews +SymLinksIfOwnerMatch
     AllowOverride All
    Require all granted
</Directory>
Alias /zm/cache "/var/cache/zoneminder"
<Directory "/var/cache/zoneminder">
    Options -Indexes +FollowSymLinks
    AllowOverride None
    <IfModule mod_authz_core.c>`
        # Apache 2.4
        Require all granted
    </IfModule>
</Directory>
Alias /zm /usr/share/zoneminder/www
<Directory /usr/share/zoneminder/www>
 Options -Indexes +FollowSymLinks
 <IfModule mod_dir.c>
   DirectoryIndex index.php
 </IfModule>
</Directory>
<Directory "/usr/share/zoneminder/www/api">
  RewriteEngine on
  RewriteRule ^$ app/webroot/ [L]
  RewriteRule (.*) app/webroot/$1 [L]
  RewriteBase /zm/api
</Directory>
<Directory "/usr/share/zoneminder/www/api/app">
  RewriteEngine on
  RewriteRule ^$ webroot/ [L]
  RewriteRule (.*) webroot/$1 [L]
  RewriteBase /zm/api
</Directory>
<Directory "/usr/share/zoneminder/www/api/app/webroot">
   RewriteEngine On
   RewriteCond %{REQUEST_FILENAME} !-d
   RewriteCond %{REQUEST_FILENAME} !-f
   RewriteRule ^ index.php [L]
   RewriteBase /zm/api
<Directory>
Final bits:
Add the www-data user to the video group:
adduser www-data video
enable and start all the services:
systemctl enable mariadb apache2 zoneminder
systemctl restart mariadb apache2 zoneminder
Check out the UI!
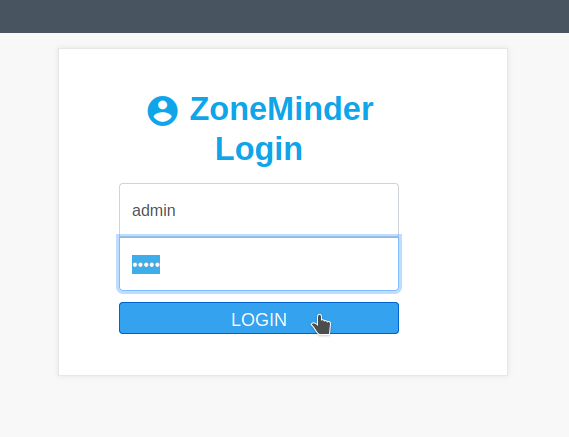
Now head to https://yourhostname.example.org and you should see a login screen like this.
(Default login is admin/admin)
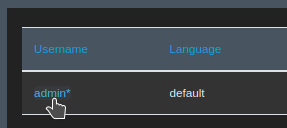
Now click "Options" at the top, "Users" on the left, and click "admin*"
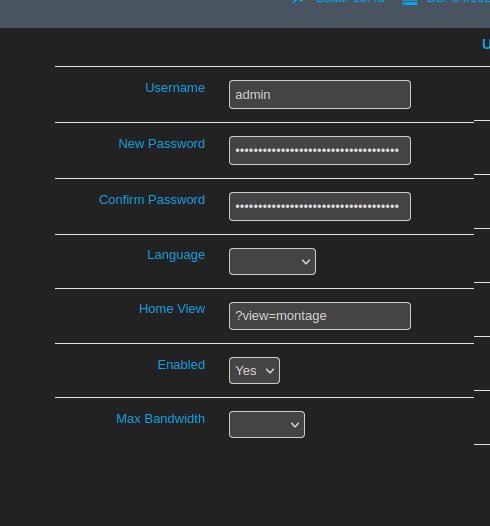
Enter a new, longer, better password and click Save
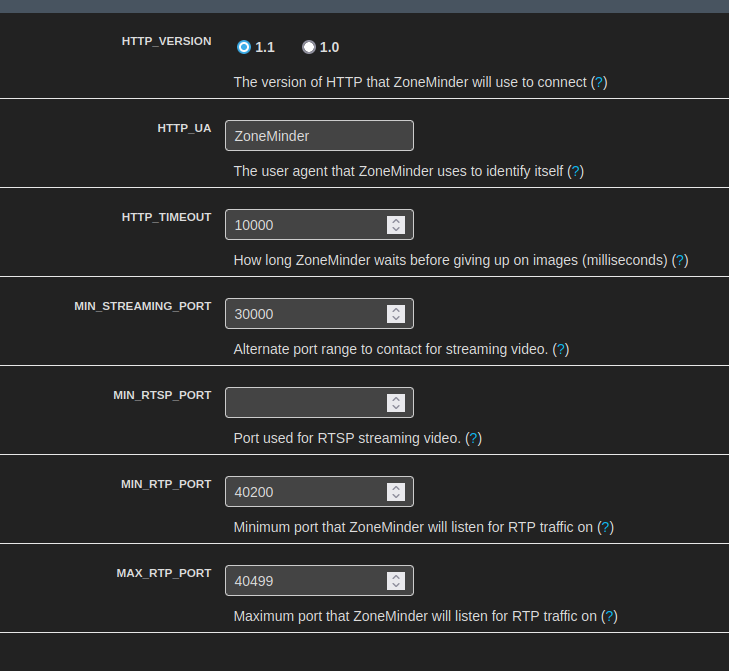
Now under Options > Network
- Set HTTP version to 1.1
- Turn up HTTP timeout (I have it set to 10000 which is probably overkill. May help with cameras failing to load.)
- Make sure MIN_STREAMING_PORT is set to 30000. This is the first port Zoneminder will use for a camera, each subsequent port gets +1. (Remember from our apache configs?)
- Hit Save.
Under options > Storage, make sure to configure your storage to point at a mounted drive on your system where you want to store the footage. (You need to configure this on the Debian side of things.) This can be whatever you like really, as long as it is writable. We use a ZFS RAID. The rest of the settings you probably want to leave at default.
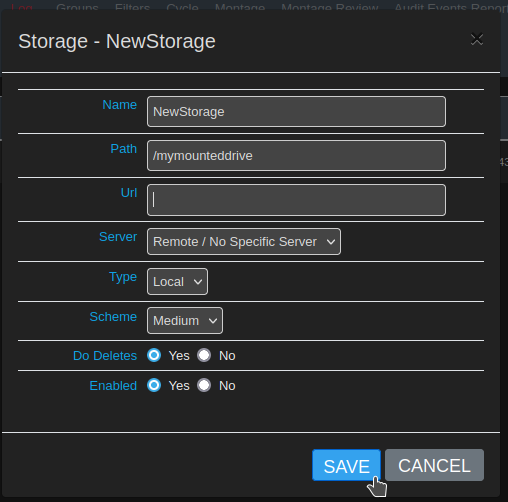
Pop into Options > System and...
- Make sure OPT_USE_AUTH is checked
- Make sure AUTH_TYPE is builtin
- Make sure AUTH_RELAY is hashed
- Change the AUTH_HASH_SECRET to a really long random string
- Hit Save

Alrighty, assuming you set up the Debian side correctly, you should be in a really solid place. All that's left is to add cameras, and set up ZMNinja for viewing! That'll be for next time. Stay tuned.


